
 Sign In
 Create Account

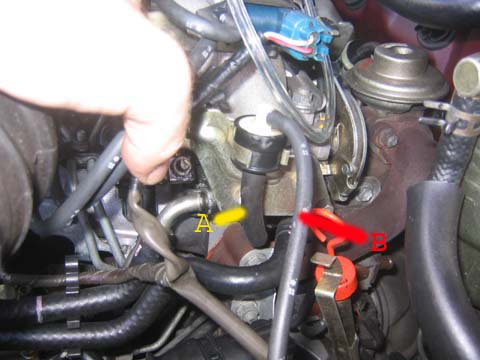
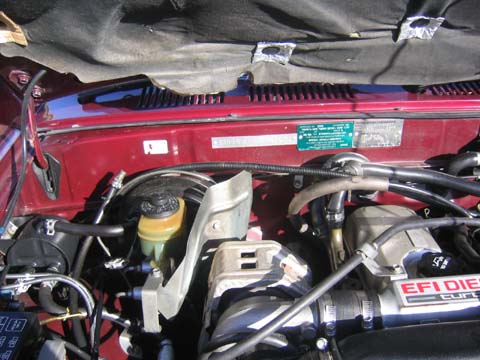
First step is to locate the hoses for vacuum/boost. As you lift the bonnet and stand in front, there is a small round filter mounted to the throttle body. This will have a large round hose from the throttle body that curves at 90 degrees {A}. This is one option for putting the T-Piece in but i used the smaller one coming out of the top {B}.
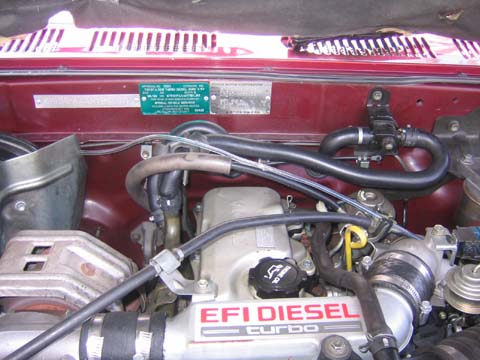
The next best option BEFORE cutting anything to mount the T piece is to run the supplied pressure hose. The route I chose is displayed below.
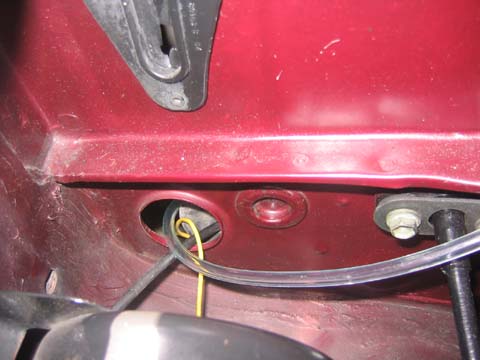
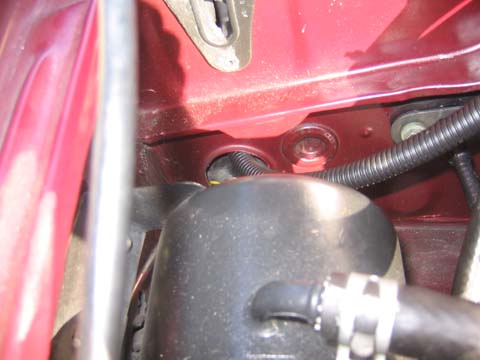
On my Surf, an automatic 2.4 injected, there was a hole in the firewall already where 2 cables already ran through. I used this for running my pressure hose as it came in on the drivers side just under the dash. From there you can run it past the fuse box (above it) and there is a small gap in the plastic panel where i ran it up to above the dash. The hole in the firewall is displayed below.
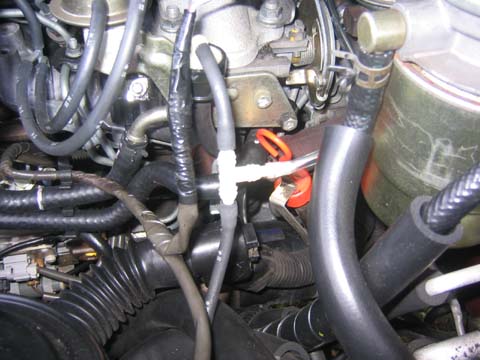
Now you know this will fit for mounting the gauge in the corner out of the way, you can put the T-Piece in. The small hose between the throttle body and the turbo pressure sensor has no clamps on it and easily pulls off. I marked out about 50mm down the hose from the filter and cut here. For putting the tube on, it is a tight fit but i filled a coffee cup with boiling water and soaked the ends in the hot water to soften it up. You can also use a pair of pliers to twist it on.
The gauge has 2 small wires going into a small light globe. Positive and negative. I used some thin gauge wire and just twisting and taping this together i ran it down the side of the dash where the boost tube ran and across the car under the dash. I simply zip tied this to the harness.
For the lighting, you have the option of tapping into the cigarette lighter light, or my ash tray had a light.
Now you can mount the cup. You can try double sided tape, but I found self tappers into the A pillar worked fine. The best way is to do a dummy fit first, and with a scribe, mark where the bracket will go. Self tapper the bracket down then mount the clamp for the cup on it.
Install the gauge into the cup and tighten everything up once you have it at the right angle and so on. For the wiring and boost tube, the cup I bought had a large hole with a grommet in it. I used this which made things really easy to just poke all the cables through.
Neatening it up is advisable as the tube shouldn't be left exposed. I used some black cable conduit that i got from a boating store. Its 10mm diameter and worked fine. 3m should do you fine and at $2.35 a metre it's cheap. It has a split down the length of it which you just push the tube through.
In this pic you should be able to see the conduit where it runs through the firewall.
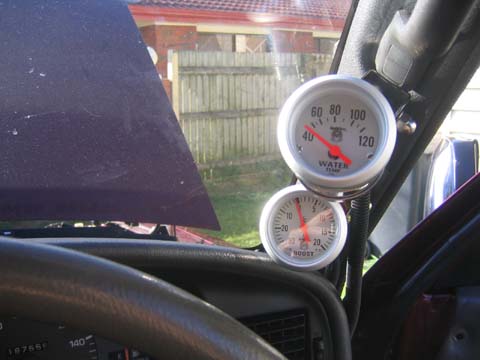
The finished product with the water temp gauge above it.

 Back to top


